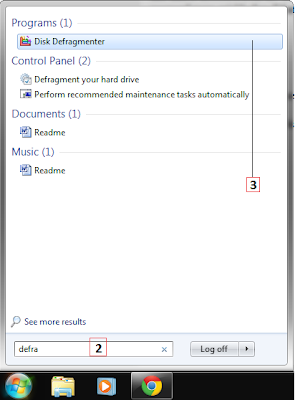
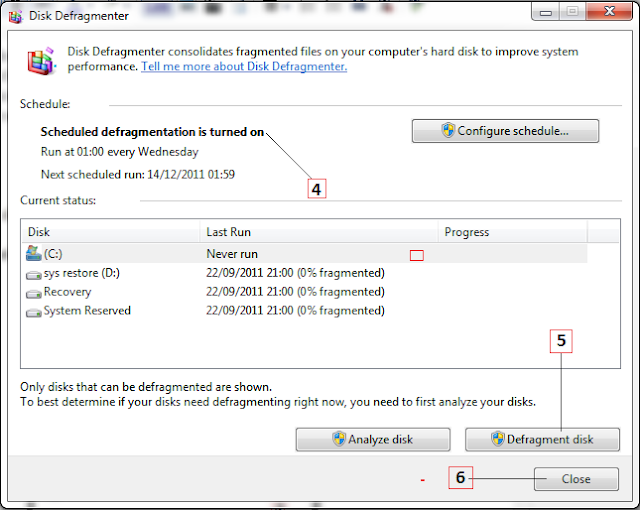
Disk Cleanup is a safe and effective way to reduce unnecessary data on your PC. With unnecessary data deleted, your PC will run faster and have more available disk space for saving files and installing programs. With Disk Cleanup you can remove temporary files, empty the Recycle Bin, remove set-up log files and downloaded program files, all in a single process.
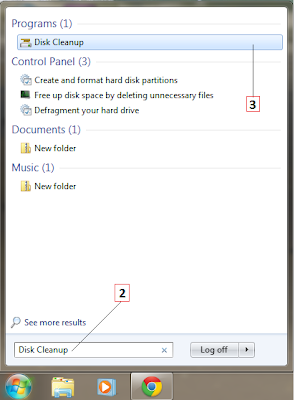
1. Click Start.
2. In the Start Search dialogue box, type Disk Cleanup.
3. In the results, under Programs, click Disk Cleanup.
4. If prompted to choose a drive or partition, choose the
letter of the drive that contains the operating system,
which is almost always C:, but occasionally D. Click
OK.
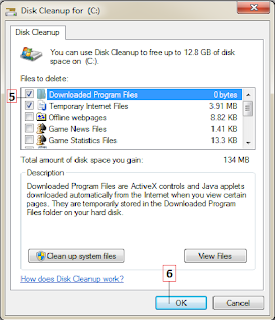
5. Select the files to delete. Accept the defaults if you
aren't sure.
6. Click OK to start the cleaning process.
WHAT DOES THIS MEAN?Downloaded program files: These are files that download automatically when you view certain web pages. they are stored temporarily in a folder on your hard disk and accessed when and if needed.
Temporary Internet Files: These files contain copies of web pages you've visited on your hard drive, so that you can view the pages more quickly when visiting the page again.
Offline webpages: These are web pages that you've chosen to store on your computer so you can view them without being connected to the Internet. Upon connection, the data is synchronised.
Game news files and game statistics files: These are files related to games you'e played, such as how many wins and losses you have or new information regarding the games.
Recycle Bin: This contains files you've deleted. Files are not permanently deleted untill you empty the Recycle Bin.
Setup Log Files: These are files created by Windows during set-up processes.
Temporary Files: These files are created and stored by programs for use by the program. Most of these temporary files are deleted when you exit the program, but some do remain.
Thumbnails: These are small icons of your pictures, videos and documents. Thumbnails will be recreated as needed, even if you delete them here.
Note : You may not be prompted to choose a drive letter if only one drive exists.


 18.14
18.14
 r
r


 When you open most folders, you will see additional folders inside them. You'll use these subfolders to organise the data you create and save, such as documents, pictures and songs. You open a folder to see what's in it and then you can change the appearance of the content inside these folders. You can configure each folder independently so that the data appears in a list, as small icons or as large icons, to name a few.
