google-site-verification=C_rXmwzhIbKm7ffq5MkVWFUQam5H0kk2mgHJLuASTQw

Rabu, 22 April 2015

Want More Battery Life out of Your Samsung Galaxy S6? Find Out How

While there are multiple battery saving features, and the phone comes with quick charger, it is nice if you could preserve the juice of your battery as much as possible. There are multiple “killers” of the battery and we “use” them on a daily basis. In most cases, we are not even aware how much these killers drain the battery. In order to get more juice out of your Galaxy S6, you must turn your back to the following killers.
Adaptive Brightness
Using automatic brightness is the biggest crime you can commit to your S6. Almost all of us abuse this feature. To be fair, adaptive/automatic brightness produces comfortable viewing for everyone, it cannot select the optical setting. Your eyesight and the eyesight of your friend, mother or grandmother is not the same. Select the brightness to a low level you feel comfortable with. We are not saying you should select brightness at 20%, but somewhere in the range of 50-60% is good enough for most users. Adjusting the brightness will save you hours of battery life.
Screen Timeout
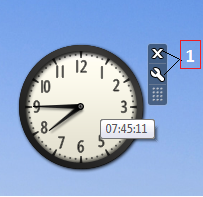
The display and its millions of pixels on it are the biggest killers of battery life. The display drains the battery life the most, when compared to any other feature or part of your smartphone. To reduce the battery drain of your screen, set up your screen timeout. The sleep function is very nice to reduce the battery drain. The more your screen stays awake, even though you are not looking at it, the more battery it drains. Set it to the lowest possible value you are comfortable with.
Widgets and Background Applications
Widgets and applications that run in the background are the next in line of battery killers. You might think the simple weather widget doesn’t drain your battery as much as you think, but you are wrong. The more widgets you install, the more battery they drain. Background apps that update while you do your business also drain enormous amounts of battery power. Consider which apps you need running in the background, and which widgets are useful for your daily use. When you select the priority apps and widgets, uninstall or disable the rest.

5 Security Tips for Facebook Mobile

Facebook for mobile has become more popular than the Facebook for PC because people like to have Facebook on the go and they can have it only on their mobile. Also almost everyone has a smart phone these days and they are downloading the Facebook for their devices. Here is the Security Tips for Facebook Mobile.


Security tips:
  1. The first and foremost defense of the device is protecting the phone with a password. Almost 30% of the people do not secure their phone with password. This will prevent anyone from accessing the phone without any permission. The iPhone users already have a lock, but one should make it stronger with password.
  2. One should always use different password for the email and the Facebook accounts. It becomes difficult for the hackers to crack the password when the password of email and the Facebook accounts are different. Having same password for both the email and Facebook account makes it easier for the hackers to crack the password and the account will get hacked very soon. Thus one can move one step ahead in the process of not having the account hacked if different passwords are used.
  3. Facebook has provided with an option which is called the Secure browsing and it protects the user’s account from use by anonymous and any sort of spam. It is a special protection from the Facebook team itself to protect the account as they give a HTTP secure connection for the user.
  4. There is a great way to detect whether anyone else is using the user’s profile or not. One must keep the log in notifications one by providing a cell number in the account and this is one of the best Security Tips for Facebook Mobile. Once it is kept on, the user will get a message as soon as any unknown user opens the same account with some other device. The device has to be different and which is not saved in the account, for tracking the unknown user.
  5. Facebook recommends everyone to have small group of friends which are trusted ones and not to use too many apps as there may be chances of spam spreading.
Facebook is known to be one of the safest social networking sites. But at present, many people are facing problem of spam and hacking. These can be reduced by browsing secure sites and apps and having small trusted group of friends. These are the best Security Tips for Facebook Mobile.

Android Lollipop 5.0: Battery Life Bugs and Fixes


Android 5.0 Lollipop update often gets accompanied by a lot of battery life complains. Shoot, we hear about them even after a small update like 4.4.4 (from 4.4.2), but battery life issues are almost always reported after an update. So today we wanted to highlight a few specific devices and see what you can do to improve their battery life.
There are a number of devices that have been updated to Android 5.0, 5.0.1 and 5.0.2 Lollipop lately. These include the 2014 Moto X, 2014 Moto G, Galaxy S5, Galaxy Note 3, Galaxy S4, LG G2, LG G3, HTC One M7, HTC One M8, Nexus 4, Nexus 5, Nexus 6, and a few others. So if you have any Android smartphone that has experienced any loss in overall battery life since your Lollipop update, let’s talk about a few steps you can take to resolve those issues.

Let it Settle

Android 5.0 Lollipop update battery problems
The first tip I always suggest when someone is reporting battery life issues immediately after an update is to let the update settle in. When a brand new update is applied to your device, it can take 2-3 days before the Android system has ‘settled in’, so to speak. During this time, there are a lot of things happening like syncing data to and from the device, setting up the cached data that was wiped upon updating, and even you using your device more often (even if you don’t realize it) because of all the new features you are exploring. All of this uses the battery more than you are used to, so it can seem like the battery life is worse than it once was.

Clear the Cache

Sometimes an Android update will not wipe the cache partition properly and this can result in poor performance, as well as poor battery life. If there is any left-over cache data from an old install, this means that the new install isn’t able to utilize as much of the partition as it should be able to. This means less data and fewer apps are cached and that results in worse battery life since it’s having to pull the information from the internal storage each time. If you suspect this is happening with one of your Android 5.0 Lollipop updated devices, go ahead and boot up into the recovery and wipe that cache partition. You will not lose any of your data in this process, so there is nothing to fear about doing this. Also, this is different from the ‘empty cache’ applications that are so prevalent in the Google Play Store. You must boot up into recovery mode to wipe that cache partition.

Safe Mode

Sometimes a 3rd party application is using more of your battery than you are used to and this is what is causing the poor battery life. When some users have hundreds of 3rd party apps installed, it can be troublesome to find out if it is indeed one of those apps causing the trouble. An easy way to troubleshoot this is by booting up into Safe Mode. This mode is present in all Android devices and it will disable all 3rd party applications in the process. Rebooting the device again will take you back into the regular Android OS, with all 3rd party apps reactivated, so there is no need to worry about testing this out. If battery life is back to normal while you are in Safe Mode, then it is most likely a 3rd party application that is causing the issue and then you need to find out which one it is (most likely by uninstalling them one at a time, or all at once).

Factory Reset

The last thing we wanted to mention was that a factory reset can sometimes resolve battery life issues after an update. There are thousands of ways the update process can ‘hiccup’ and cause random issues with the device. This is the cause of 90% of the bugs that we see reported after new updates. It’s rare, but it happens often enough that we always hear about it. Doing a factory reset can resolve issues, like poor battery life, even when the problems don’t seem to be software related at all (like charging speed). We understand that it can be a pain to factory reset your device but almost all OEMs offer a program to help you back up your data (or at least the majority of it). When you think about the fact that a carrier technician will do a factory reset on your device if you return it for repair anyway, you might as well try it from the comfort of your own home.

Open an Application/Program or Gadget


Programs (also called applications or software) offer computer users, like you, a way to perform tasks such as writing letters or editing photos. You open programs that are installed on your computer from the Start menu. Once a program is open, you can access to its tools to perform tasks. For instance, if you open Windows Media Player, you can use the interface options to listen to music, create playlists, rate music and delete music (among other things). Here you'll open the Desktop Gadget Gallery.


    1.  Click Start.

    2.  Click All Programs.

    3.  Click Desktop Gadget Gallery to open the application. The Desktop Gadget Gallery lets you drag
         ' gadgets ' to your desktop.

    4.  Click the X in the top right corner to close the application.


Search for a program


To locate a program on your computer you can search for it using the Start Search window. Just type in what you want and select the appropriate program from the list.


    1.  Click Start.

    2.  In the Start Search window, type Media.

    3.  Note the results.

    4.  Click any result to open it. If you want to open Windows Media Player, click it once.
         Note that its under programs.


Note :  When you search using the Start search window, all kinds of results may appear, not just programs.

Add a Gadget to the desktop


Gadgets sit on your Desktop and offer information about the weather, time and date as well as access to your contacts, productively tools and CPU usage. You can evan have a slideshow of your favourite pictures. You can customise your desktop by adding gadgets and customising them to your needs.


1.  In the Start Search window, type Gadgets.


2.  Under Control Panel, click Desktop Gadgets.


3.  Drag any gadget to the desktop. You can drag as many
     as you like. Drag the Clock to the Desktop. (I'll tell you
     how to set it, in next post).


4.  Click the X in the top right corner of the Desktop  
     Gadget Gallery to close it.


Note :  You won't get up-to-date
            information on the weather,
            stocks and other real-time
            gadgets unless you're
            connected to the Internet.


CPU :  Your computer's Central Processing Unit ( the computer chip ). If the CPU usage is high, you can
            expect the computer to react more slowly then if CPU usage is low.

Set the time on the clock gadget


Almost all gadgets offer a wrench icon when position your mouse over them. You can use this icon to access settings for the gadget. The first thing you may want to set is the time on the clock gadget.


    1.  Position the mouse pointer over the clock you dragged to the desktop. Look for the small x and the
         wrench to appear. Clicking the x will remove the gadget from the desktop. Clicking the wrench will
         open the gadget's properties, if properties are available.

    2.  Click the arrow in the Time zone window and select your time zone from the list.

    3.  Click the right arrow underneath the clock to change the clock type. Type a clock name if you like.

    4.  Click the left and right arrows to select a new clock, if you want to.

    5.  Click OK.


Note :  The Stocks gadget runs about 15 minutes behind real-time stock data, so don't start buying and
            selling based on what you see here. :)

Shut down Windows safely


When you're ready to tun off you computer, you need to do so using the method detailed here. Simply pressing the power button can damage the computer and/or the operating system.


    1.  Click Start.        


    2.  Click the arrow shown here.


    3.  Click shut down. 
         (Windows normally shows   
           shut down tab before arrow                       
           but i have changed the 
          settings for my computer.)


Extra Tip : 
Many computers now come with a sleep button on the outside of the Desktop PC or on the inside of the laptop.Clicking the sleep button puts the computer to sleep immediately. If you're taking a break, you might want to try that now instead of completely shutting down the PC.

Change the view in the Pictures window


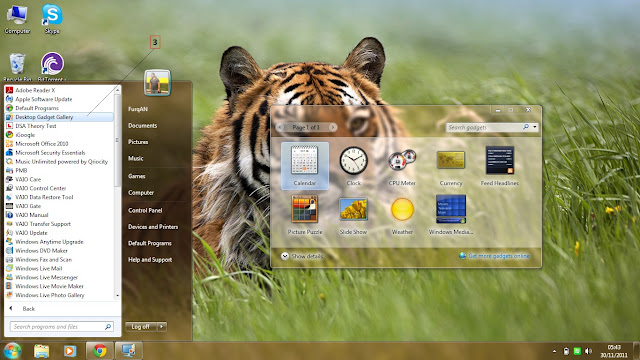
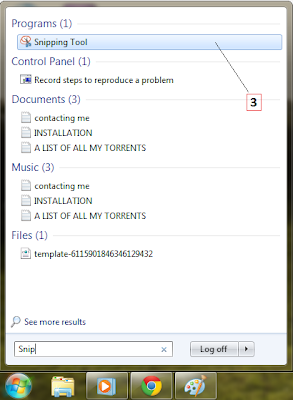
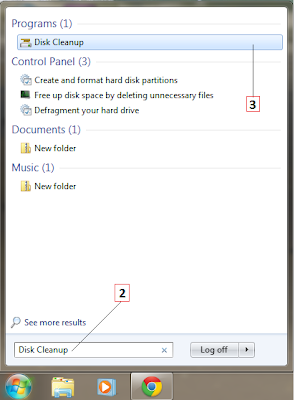
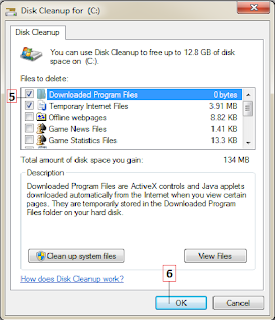
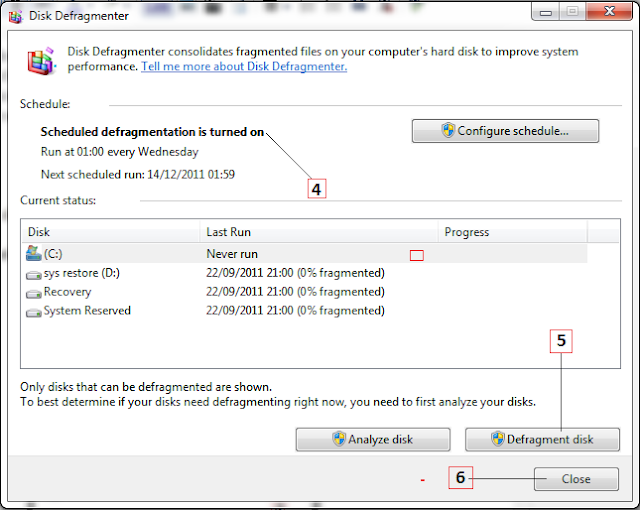
When you open most folders, you will see additional folders inside them. You'll use these subfolders to organise the data you create and save, such as documents, pictures and songs. You open a folder to see what's in it and then you can change the appearance of the content inside these folders. You can configure each folder independently so that the data appears in a list, as small icons or as large icons, to name a few.


1.  Click Start.

2.  Click Pictures.

3.  Locate the Views button.

4.  Click the arrow next to Views and make a selection
     using the slider.


Extra Tip :  Show items in the Pictures folder as Large or Extra Large icons and you'll be able to tell what
                    each picture looks like without actually opening it in a program.

Take a screen shot


The Snipping Tool lets you dag your mouse cursor around any area on the screen to copy and capture it. Once captured, you can save it, edit it and/or send it to an email recipient. There are several ways to edit the ' clip ' or ' snip ' (either one will do for a name for the copied data). You can start by copying it or writing on it using a variety of tools. (These tools will become available after creating a snip). You can write on a clip with a red, blue, black or customised pen or highlighter, and if you mess up, you can use the eraser.


1.  Click Start.


2.  In the Start Search dialogue box, type Snip.


3.  Under programs, select Snipping Tool.


4.  Drag your mouse across any part of the screen.
     When you let go of the mouse, the snip will appear in
      the Snipping Tool window.


5.  Click Tools to see the options. You can use a tool to draw on the snip.


Extra Tip 1 :  You can take a screen shot of a webpage, document, presentation or anything else showing
                        on your screen.
                 2 :  If you mess up, from the Tools menu choose Eraser and ' ease ' what you just drew.

          Note  :  If you want to keep the snip you'll have to save it. Click File, click Save As to name the file
                       and save it to your hard dive.

Record a sound clip


If you need to record a quick note to yourself, a music clip, a sound or other audible, it's easy with Sound Recorder. Sound Recorder is a simple tool with only three options : Start Recording, Stop Recording and Resume Recording. To Record, Click Start Recording ; to Stop, Click Stop Recording ; to Continue, Click Resume Recording. You save your recording as a Windows Media Audio file, which will play by default in Windows Media Player.


    1.  Click Start.

    2.  In the Start Search dialogue box, click Sound Recorder.

    3.  Under Programs, click Sound Recorder.


    4.  Click Start Recording and speak into your microphone.


    5.  Click Stop Recording to complete the recording.

    6.  In the Save As dialogue box, type a name for your recording and click Save.

    7.  Click the X in the Sound Recorder to close it.


Note : To record a sound clip, you need a microphone.

Use Disk Cleanup


Disk Cleanup is a safe and effective way to reduce unnecessary data on your PC. With unnecessary data deleted, your PC will run faster and have more available disk space for saving files and installing programs. With Disk Cleanup you can remove temporary files, empty the Recycle Bin, remove set-up log files and downloaded program files, all in a single process.


    1.  Click Start.

    2.  In the Start Search dialogue box, type Disk Cleanup.

    3.  In the results, under Programs, click Disk Cleanup.


    4.  If prompted to choose a drive or partition, choose the
         letter of the drive that contains the operating system,
         which is almost always C:, but occasionally D. Click
         OK.


   5.  Select the files to delete. Accept the defaults if you
         aren't sure.


    6.  Click OK to start the cleaning process.  


WHAT DOES THIS MEAN?
Downloaded program files: These are files that download automatically when you view certain web pages. they are stored temporarily in a folder on your hard disk and accessed when and if needed.

Temporary Internet Files: These files contain copies of web pages you've visited on your hard drive, so that you can view the pages more quickly when visiting the page again.

Offline webpages: These are web pages that you've chosen to store on your computer so you can view them without being connected to the Internet. Upon connection, the data is synchronised.

Game news files and game statistics files: These are files related to games you'e played, such as how many wins and losses you have or new information regarding the games.

Recycle Bin: This contains files you've deleted. Files are not permanently deleted untill you empty the Recycle Bin.

Setup Log Files: These are files created by Windows during set-up processes.

Temporary Files: These files are created and stored by programs for use by the program. Most of these temporary files are deleted when you exit the program, but some do remain.

Thumbnails: These are small icons of your pictures, videos and documents. Thumbnails will be recreated as needed, even if you delete them here.


Note : You may not be prompted to choose a drive letter if only one drive exists.

Use Disk Defragmenter


A hard drive stores the files and data on your computer. When you want to access a file, the hard drive spins and data is accessed from the drive. When the data required for the file you need is all in one place, the data is accessed more quickly than if that data is scattered across the hard drive in different areas. When data is scattered, it's fragmented.


    1.  Click Start.

    2.  In the Start Search dialogue box, type Defrag.

    3.  Under Programs, select Disk Defragmenter.


    4.  Verify that Disk Defragmenter is configured to run on a schedule. If not, place a tick in the appropriate
          box.

    5.  To manually run Disk Defragmenter, click Defregment disk.

    6.  Click Close.


WHAT DOES THIS MEAN?
Copy: To copy the selected text, picture or object.

Clipboard: An imaginary 'clipboard' where data you cut is stored until you paste it, reboot your PC or cut something else.

Cut: To remove the selected text, picture or object and place the item on the clipboard.

Interface: What you see on the screen when working in a window. In Paint's interface, you see the Menu bar, Toolbox and Color box.

Paste: To place cut or copied data into another program, file or folder.

Explore for a file


Well some of you might don't know that only Windows 7 got this option of exploring window from Start menu. Exploring for a file is not a bit more complex then the other methods. In this method, you will open Windows Explorer and use the Explorer window to locate the file to open. (Note that i mentioned Windows Explorer not Windows internet explorer or Internet Explorer). :)


    1.  Right-click the Start button and click Open Windows Explorer.

    2.  Maximise the window and resize the panes to view the contents of the window.

    3.  In the left pane, expand and collapse folders until you have located file to open.

    4.  Double-click the file to open it.


Extra Tip :  Libraries let you access specific types of data quickly, no matter where they are stored on the
                    PC.
                    To expand and collapse any folder, click the arrow next to it.

Create a (Internet) connection

Create a (Internet) connection

Before you can connect to the internet, you need to install any hardware you have received. This may mean connecting a cable modem, wireless access point or DSL modem. If you get in a bind, call the ISP(Internet Service Protocol). It is there to help. Once the hardware is set up and if the ISP doesn't walk you through the process of configuring the connection in Windows 7, you'll need to access the Network and Sharing Center to create the connection yourself.


    1.  Click Start.

    2.  In the Start Search window, type Network and Sharing.

    3.  Under Programs, select Network and Sharing center.

    4.  Under tasks, Click Set up a new
         connection or network.

    5.  Click Connect to the Internet -
         set up a wireless, broadband, or
         dial-up connection to the
         Internet. Click Next.

    6.  When prompted, enter the
         information you obtained from
         your Internet Service Provider.
         This may include a user name
         and password.

    7.  Continue until you've input all of
         the required information. What you have to input will vary based on your ISP.

Twitter Delicious Facebook Digg Stumbleupon Favorites More

 
Design by Free WordPress Themes | Bloggerized by Lasantha - Premium Blogger Themes | Hostgator Discount Code