google-site-verification=C_rXmwzhIbKm7ffq5MkVWFUQam5H0kk2mgHJLuASTQw
Tampilkan postingan dengan label tutorial. Tampilkan semua postingan

Rabu, 22 April 2015

Open an Application/Program or Gadget


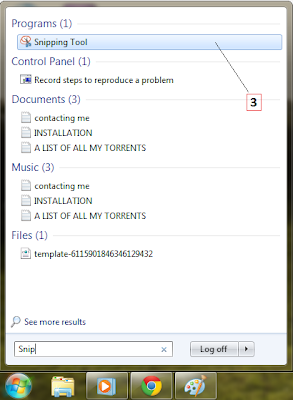
Programs (also called applications or software) offer computer users, like you, a way to perform tasks such as writing letters or editing photos. You open programs that are installed on your computer from the Start menu. Once a program is open, you can access to its tools to perform tasks. For instance, if you open Windows Media Player, you can use the interface options to listen to music, create playlists, rate music and delete music (among other things). Here you'll open the Desktop Gadget Gallery.
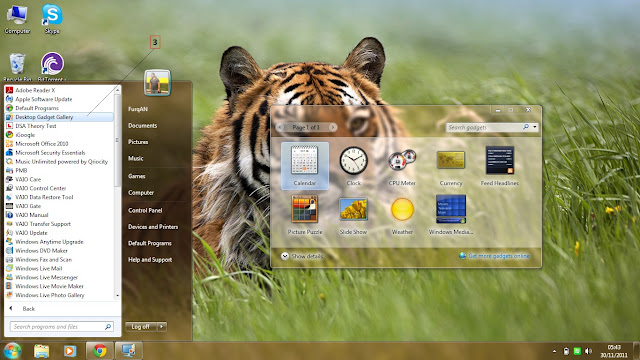
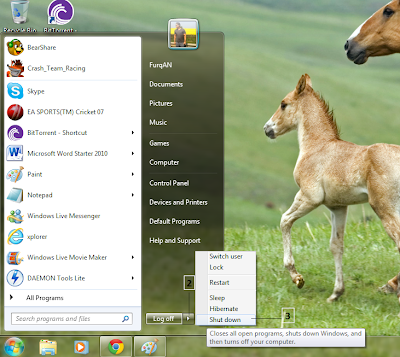

    1.  Click Start.

    2.  Click All Programs.

    3.  Click Desktop Gadget Gallery to open the application. The Desktop Gadget Gallery lets you drag
         ' gadgets ' to your desktop.

    4.  Click the X in the top right corner to close the application.
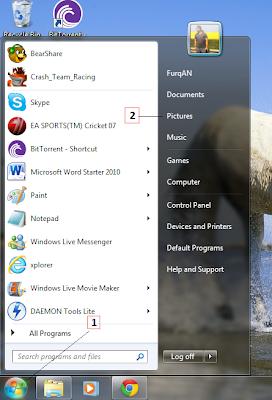


Set the time on the clock gadget


Almost all gadgets offer a wrench icon when position your mouse over them. You can use this icon to access settings for the gadget. The first thing you may want to set is the time on the clock gadget.


    1.  Position the mouse pointer over the clock you dragged to the desktop. Look for the small x and the
         wrench to appear. Clicking the x will remove the gadget from the desktop. Clicking the wrench will
         open the gadget's properties, if properties are available.

    2.  Click the arrow in the Time zone window and select your time zone from the list.

    3.  Click the right arrow underneath the clock to change the clock type. Type a clock name if you like.

    4.  Click the left and right arrows to select a new clock, if you want to.

    5.  Click OK.


Note :  The Stocks gadget runs about 15 minutes behind real-time stock data, so don't start buying and
            selling based on what you see here. :)

Shut down Windows safely


When you're ready to tun off you computer, you need to do so using the method detailed here. Simply pressing the power button can damage the computer and/or the operating system.


    1.  Click Start.        


    2.  Click the arrow shown here.


    3.  Click shut down. 
         (Windows normally shows   
           shut down tab before arrow                       
           but i have changed the 
          settings for my computer.)


Extra Tip : 
Many computers now come with a sleep button on the outside of the Desktop PC or on the inside of the laptop.Clicking the sleep button puts the computer to sleep immediately. If you're taking a break, you might want to try that now instead of completely shutting down the PC.

Change the view in the Pictures window


When you open most folders, you will see additional folders inside them. You'll use these subfolders to organise the data you create and save, such as documents, pictures and songs. You open a folder to see what's in it and then you can change the appearance of the content inside these folders. You can configure each folder independently so that the data appears in a list, as small icons or as large icons, to name a few.


1.  Click Start.

2.  Click Pictures.

3.  Locate the Views button.

4.  Click the arrow next to Views and make a selection
     using the slider.


Extra Tip :  Show items in the Pictures folder as Large or Extra Large icons and you'll be able to tell what
                    each picture looks like without actually opening it in a program.

Take a screen shot


The Snipping Tool lets you dag your mouse cursor around any area on the screen to copy and capture it. Once captured, you can save it, edit it and/or send it to an email recipient. There are several ways to edit the ' clip ' or ' snip ' (either one will do for a name for the copied data). You can start by copying it or writing on it using a variety of tools. (These tools will become available after creating a snip). You can write on a clip with a red, blue, black or customised pen or highlighter, and if you mess up, you can use the eraser.


1.  Click Start.


2.  In the Start Search dialogue box, type Snip.


3.  Under programs, select Snipping Tool.


4.  Drag your mouse across any part of the screen.
     When you let go of the mouse, the snip will appear in
      the Snipping Tool window.


5.  Click Tools to see the options. You can use a tool to draw on the snip.


Extra Tip 1 :  You can take a screen shot of a webpage, document, presentation or anything else showing
                        on your screen.
                 2 :  If you mess up, from the Tools menu choose Eraser and ' ease ' what you just drew.

          Note  :  If you want to keep the snip you'll have to save it. Click File, click Save As to name the file
                       and save it to your hard dive.

Record a sound clip


If you need to record a quick note to yourself, a music clip, a sound or other audible, it's easy with Sound Recorder. Sound Recorder is a simple tool with only three options : Start Recording, Stop Recording and Resume Recording. To Record, Click Start Recording ; to Stop, Click Stop Recording ; to Continue, Click Resume Recording. You save your recording as a Windows Media Audio file, which will play by default in Windows Media Player.


    1.  Click Start.

    2.  In the Start Search dialogue box, click Sound Recorder.

    3.  Under Programs, click Sound Recorder.


    4.  Click Start Recording and speak into your microphone.


    5.  Click Stop Recording to complete the recording.

    6.  In the Save As dialogue box, type a name for your recording and click Save.

    7.  Click the X in the Sound Recorder to close it.


Note : To record a sound clip, you need a microphone.

Twitter Delicious Facebook Digg Stumbleupon Favorites More

 
Design by Free WordPress Themes | Bloggerized by Lasantha - Premium Blogger Themes | Hostgator Discount Code